Quarantine Kitchen Project
So I’ve been wanting to paint my kitchen cabinets for a loooong time now. I talked to my husband about it, watched a LOT of Youtube videos on it, and even asked friends who had done it themselves. After hearing how much WORK it was to do, I decided I’d just pay someone to come and paint them.
Aaaaand then quarantine hit haha. After the first few days, I knew I had to come up with some project to work on. So.. I changed my mind and we decided to paint the kitchen ourself! Yes, it was A L O T O F W O R K. But it’s not impossible. We’ve had a few people ask questions on how we did it SO I figured I’d just do a blog post on it!!! Because there are a lot of things you come across & have to troubleshoot that you did NOT read about online. Hopefully this will be thorough and helpful if you decide to tackle this project during quarantine!
Supply List:
Looots of drop cloths
Degreaser or Deglosser (to clean the cabinets. I used TSP & Krud Kutter & I preferred the Krud Kutter)
Electric Sander
Sponge
Tack Cloths
Primer (I used Kilz Original Interior Primer)
Cabinet Paint (I used Behr Premium Semi Gloss)
Paint Stirers
Paint Roller (one for primer, one for paint. For the paint, I used a high density foam roller from Home Depot. Make sure it is a NICE, professional roller.)
Paint Brush (again, make sure they are professional. The higher the price, the better quality the roller. We used Purdy Professional Paintbrush for our trim and primer)
Painter’s Tripod
Frog Tape
Paint Sprayer
Workbench/Table


Step 1: Take down doors & drawers
Unless you want to paint inside your kitchen, which I did NOT want to do because of the mess, you have to take all the drawers and doors off the hinges. We numbered every door (and stuck a piece of tape with the number inside the cabinet as well) , put the hardware inside ziplock bags, and then numbered the bags accordingly. We don’t have that many cabinets but this is a VERY important step so that you don’t loose hardware and you know which cabinet door goes where when its time to put everything back up! Also, it might not be a bad idea to somehow distinguish the top of the door from the bottom. That way you’re not putting them back on upside down ;)
Step 2: Clean the cabinets
You won’t believe how dirty your cabinets are!! So it’s necessary to clean them first. You get mixed messages when you look on online when it comes to when to clean them..before or after priming. I did mine before. But I’m not sure if it matters?! We cleaned with TSP which is really toxic and not good for the environment. I also bought Krud Kutter, and ended up just using that instead. Clean them really well and then wash off ALL the solution with a wet rag.

Step 3: Sand
This is the most tedious part of the process! You’ll also read a few places online that you don’t have to sand, but I’d STRONGLY suggest it! You have to rough up the surface in order for the primer and paint to adhere well. We started off hand sanding it, which was taking foooorreeevverrrrr. So we switched to an electric sander and that sped up everything big time! Once everything is sanded down, make sure to get ALL the excess dust off the cabinets before priming. This is VERY important!! We used a tack cloth for this and those things are LIFESAVERS!!
Step 4: Prime
Once everything has been sanded down and cleaned off, it’s time to prime!! Some paints will be a 2in1, with primer included. But for cabinets, I’d highly suggest doing the primer separately. Yes its another step, but its WORTH it because your cabinets get touched & wiped down a lot and you don’t want paint coming off. We primed our with a paint brush, which was honestly a bad idea. It was very streaky and you could feel the brush marks when you ran your fingers across it. We didn’t want that texture to come through the paint SOOO we had to go back and re-sand everything again after the primer was done drying. Not a fun, additional step. So definitely roll on your primer and just use the brush to get in the cracks.


Step 5: Paint
Once the primer was dry, I wiped down everything again with a tack cloth, right before painting. We set up tons of drop cloths in our garage and put the drawers and doors on the painters tripod, to elevate them so they weren’t sitting on the ground. These things were the BEST. You’ll need 3-4 per door, so get a lot of them. We did our upper cabinets white, lower ones black. So we lined up all the upper cabinets and painted those first. Now…let me tell you the hands down, non negotiable thing you MUST buy before this step, and that is a PAINT SPRAYER. This thing saved our lives!! It was SO quick, SO easy, and gave the most smooth coat of paint!!! I can’t imagine painting them any other way. We did two coats, per side. This took a while, due to the drying time. Once the first set of doors was finished, we put them in our office to dry and went on to the next set.

Step 6: Let them dry
I read SOOoooOOooO many different opinions on this. Some people say to wait an entire week before hanging the doors back up, some people say they waited 24 hours. I’m not sure if there is a right or wrong, but I definitely would rather be safe than sorry. Especially after all that work. We let them dry in our office with a fan blowing on them & waited about 4 days before rehanging them.

Step 7: Rehang all the doors and drawers
If you labeled everything correctly & kept up with which door goes where, this step is easy. We didn’t mark which side was the top & bottom, so that took us some time to figure out. But honestly, it doesn’t reallyyyyy matter if they’re upside down. But its probably easier if you put them back in the correct way.
And that’s it!! We started this project on a Friday late afternoon, finished painting Monday afternoon, & put all the doors back on the next Friday. So all in all, not a horribly long project. You just have to be okay with your house being torn apart for a week ;)
—————————————————————————————————————————————
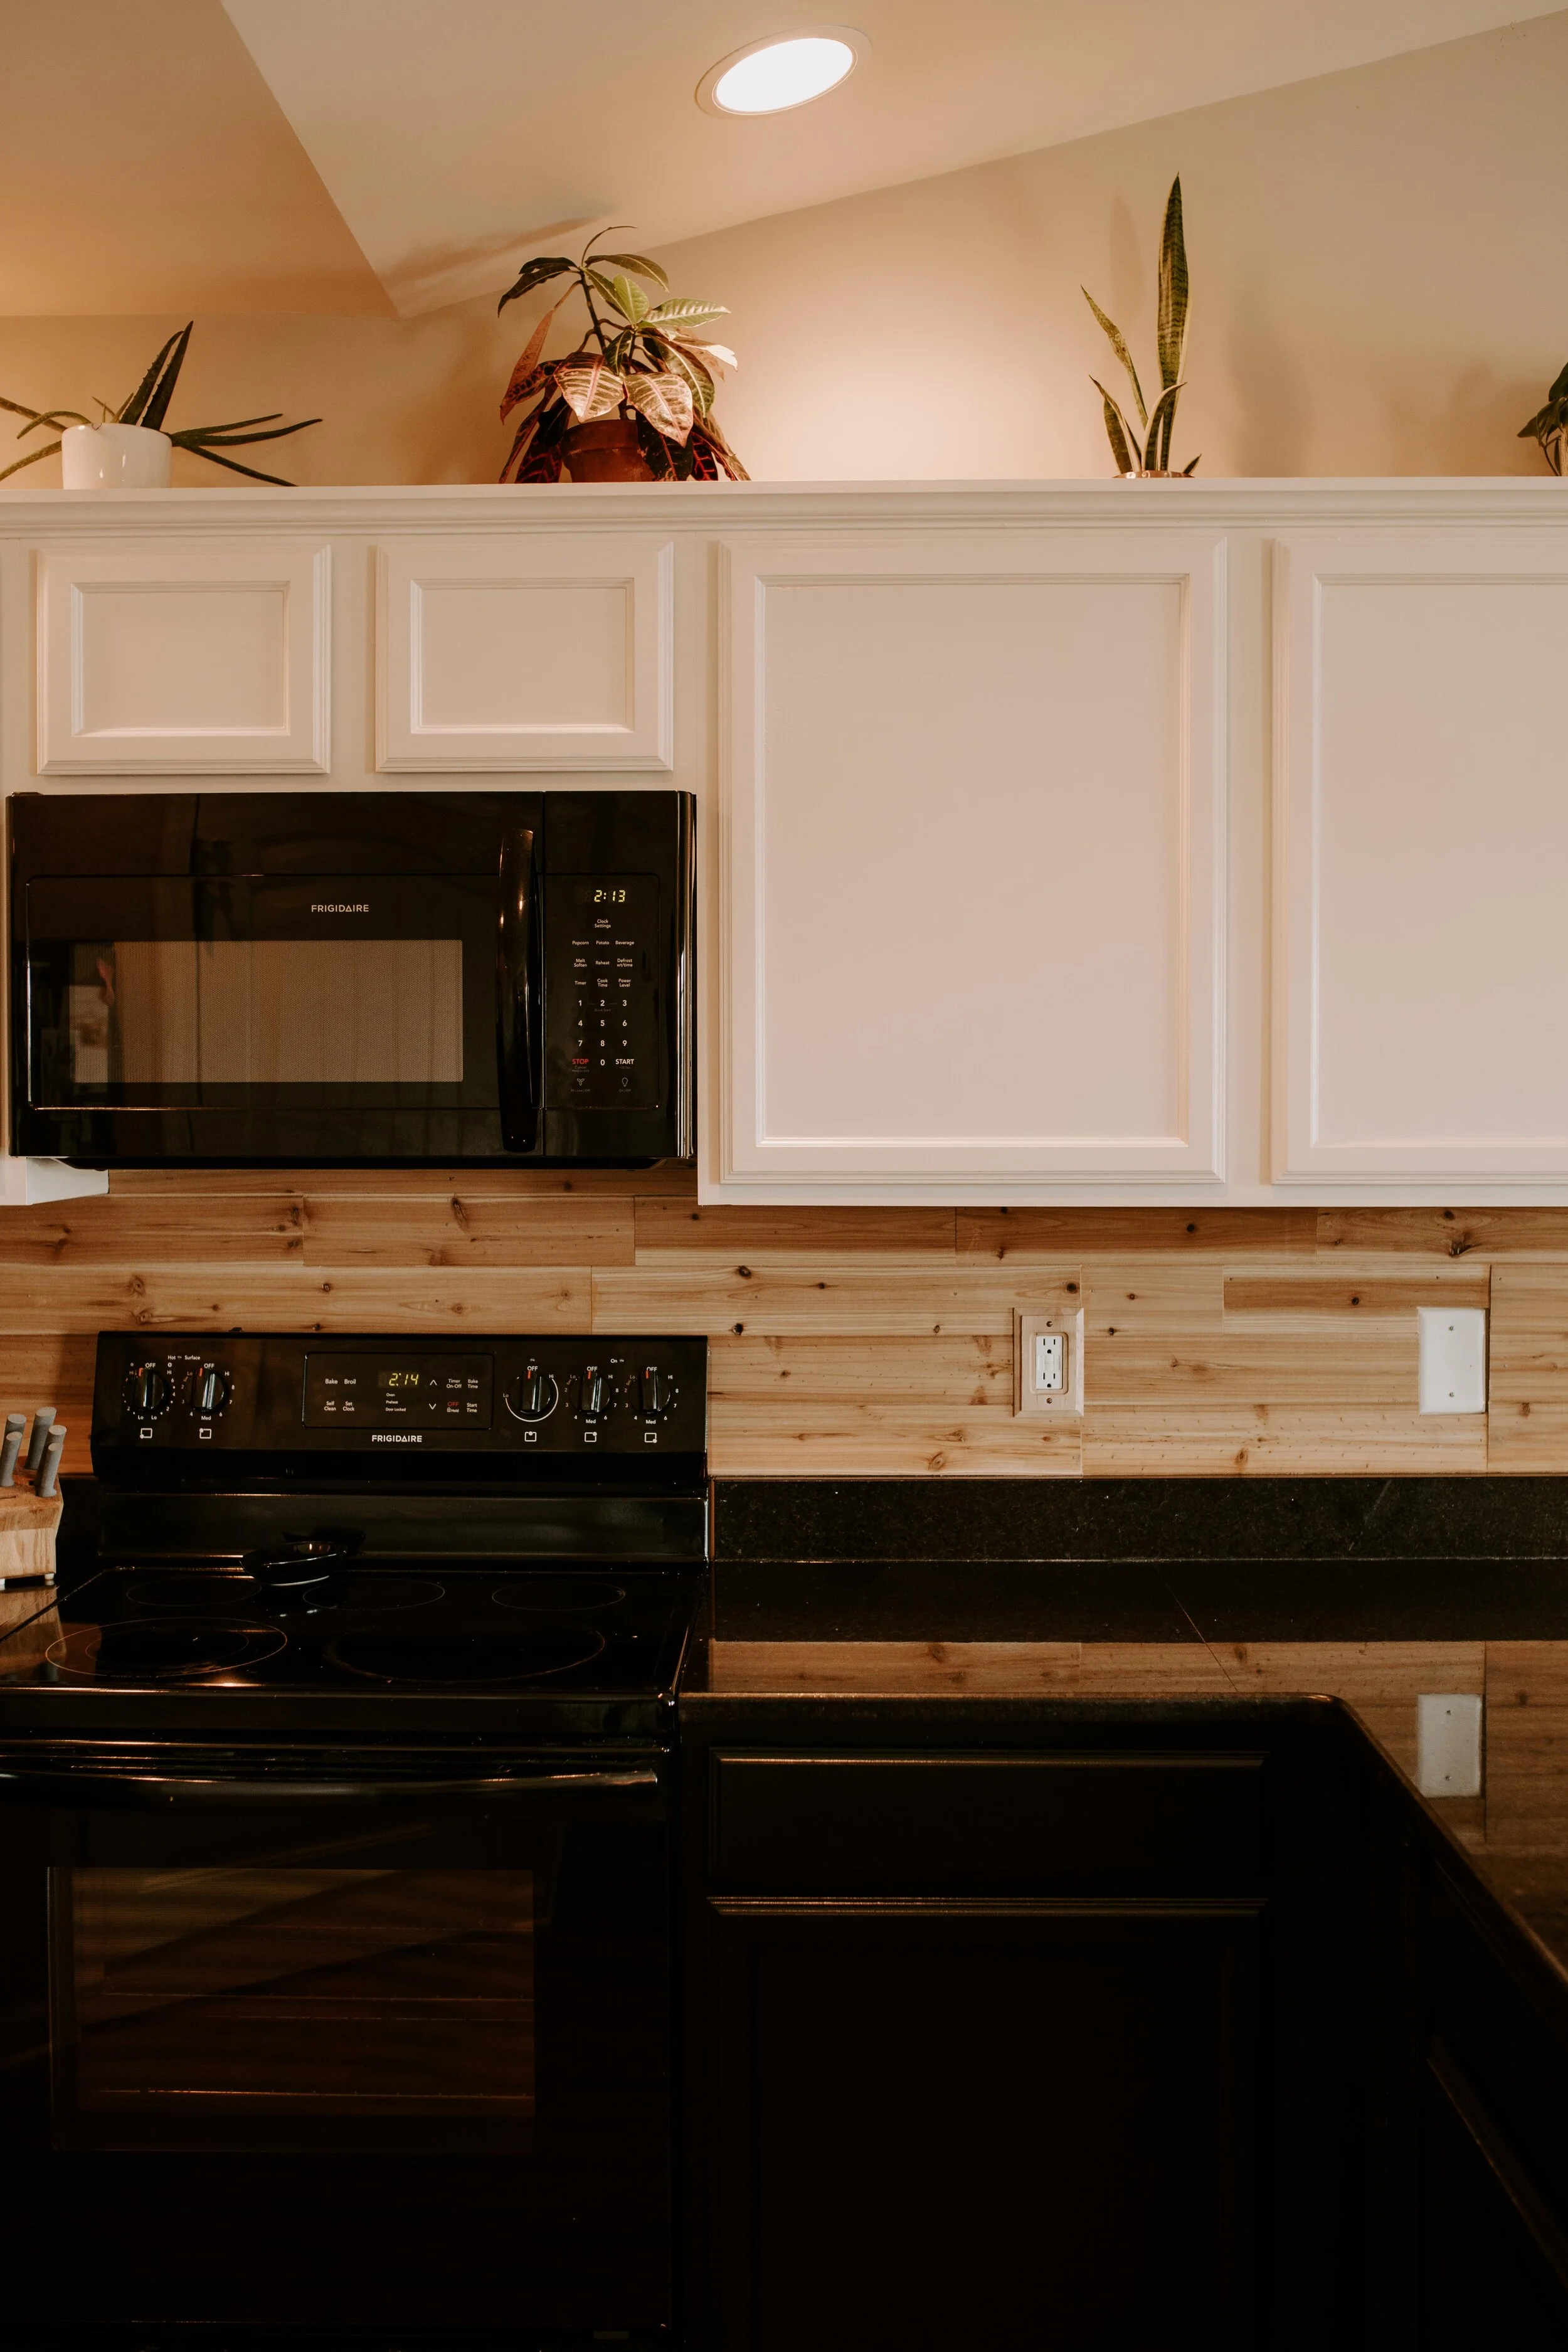
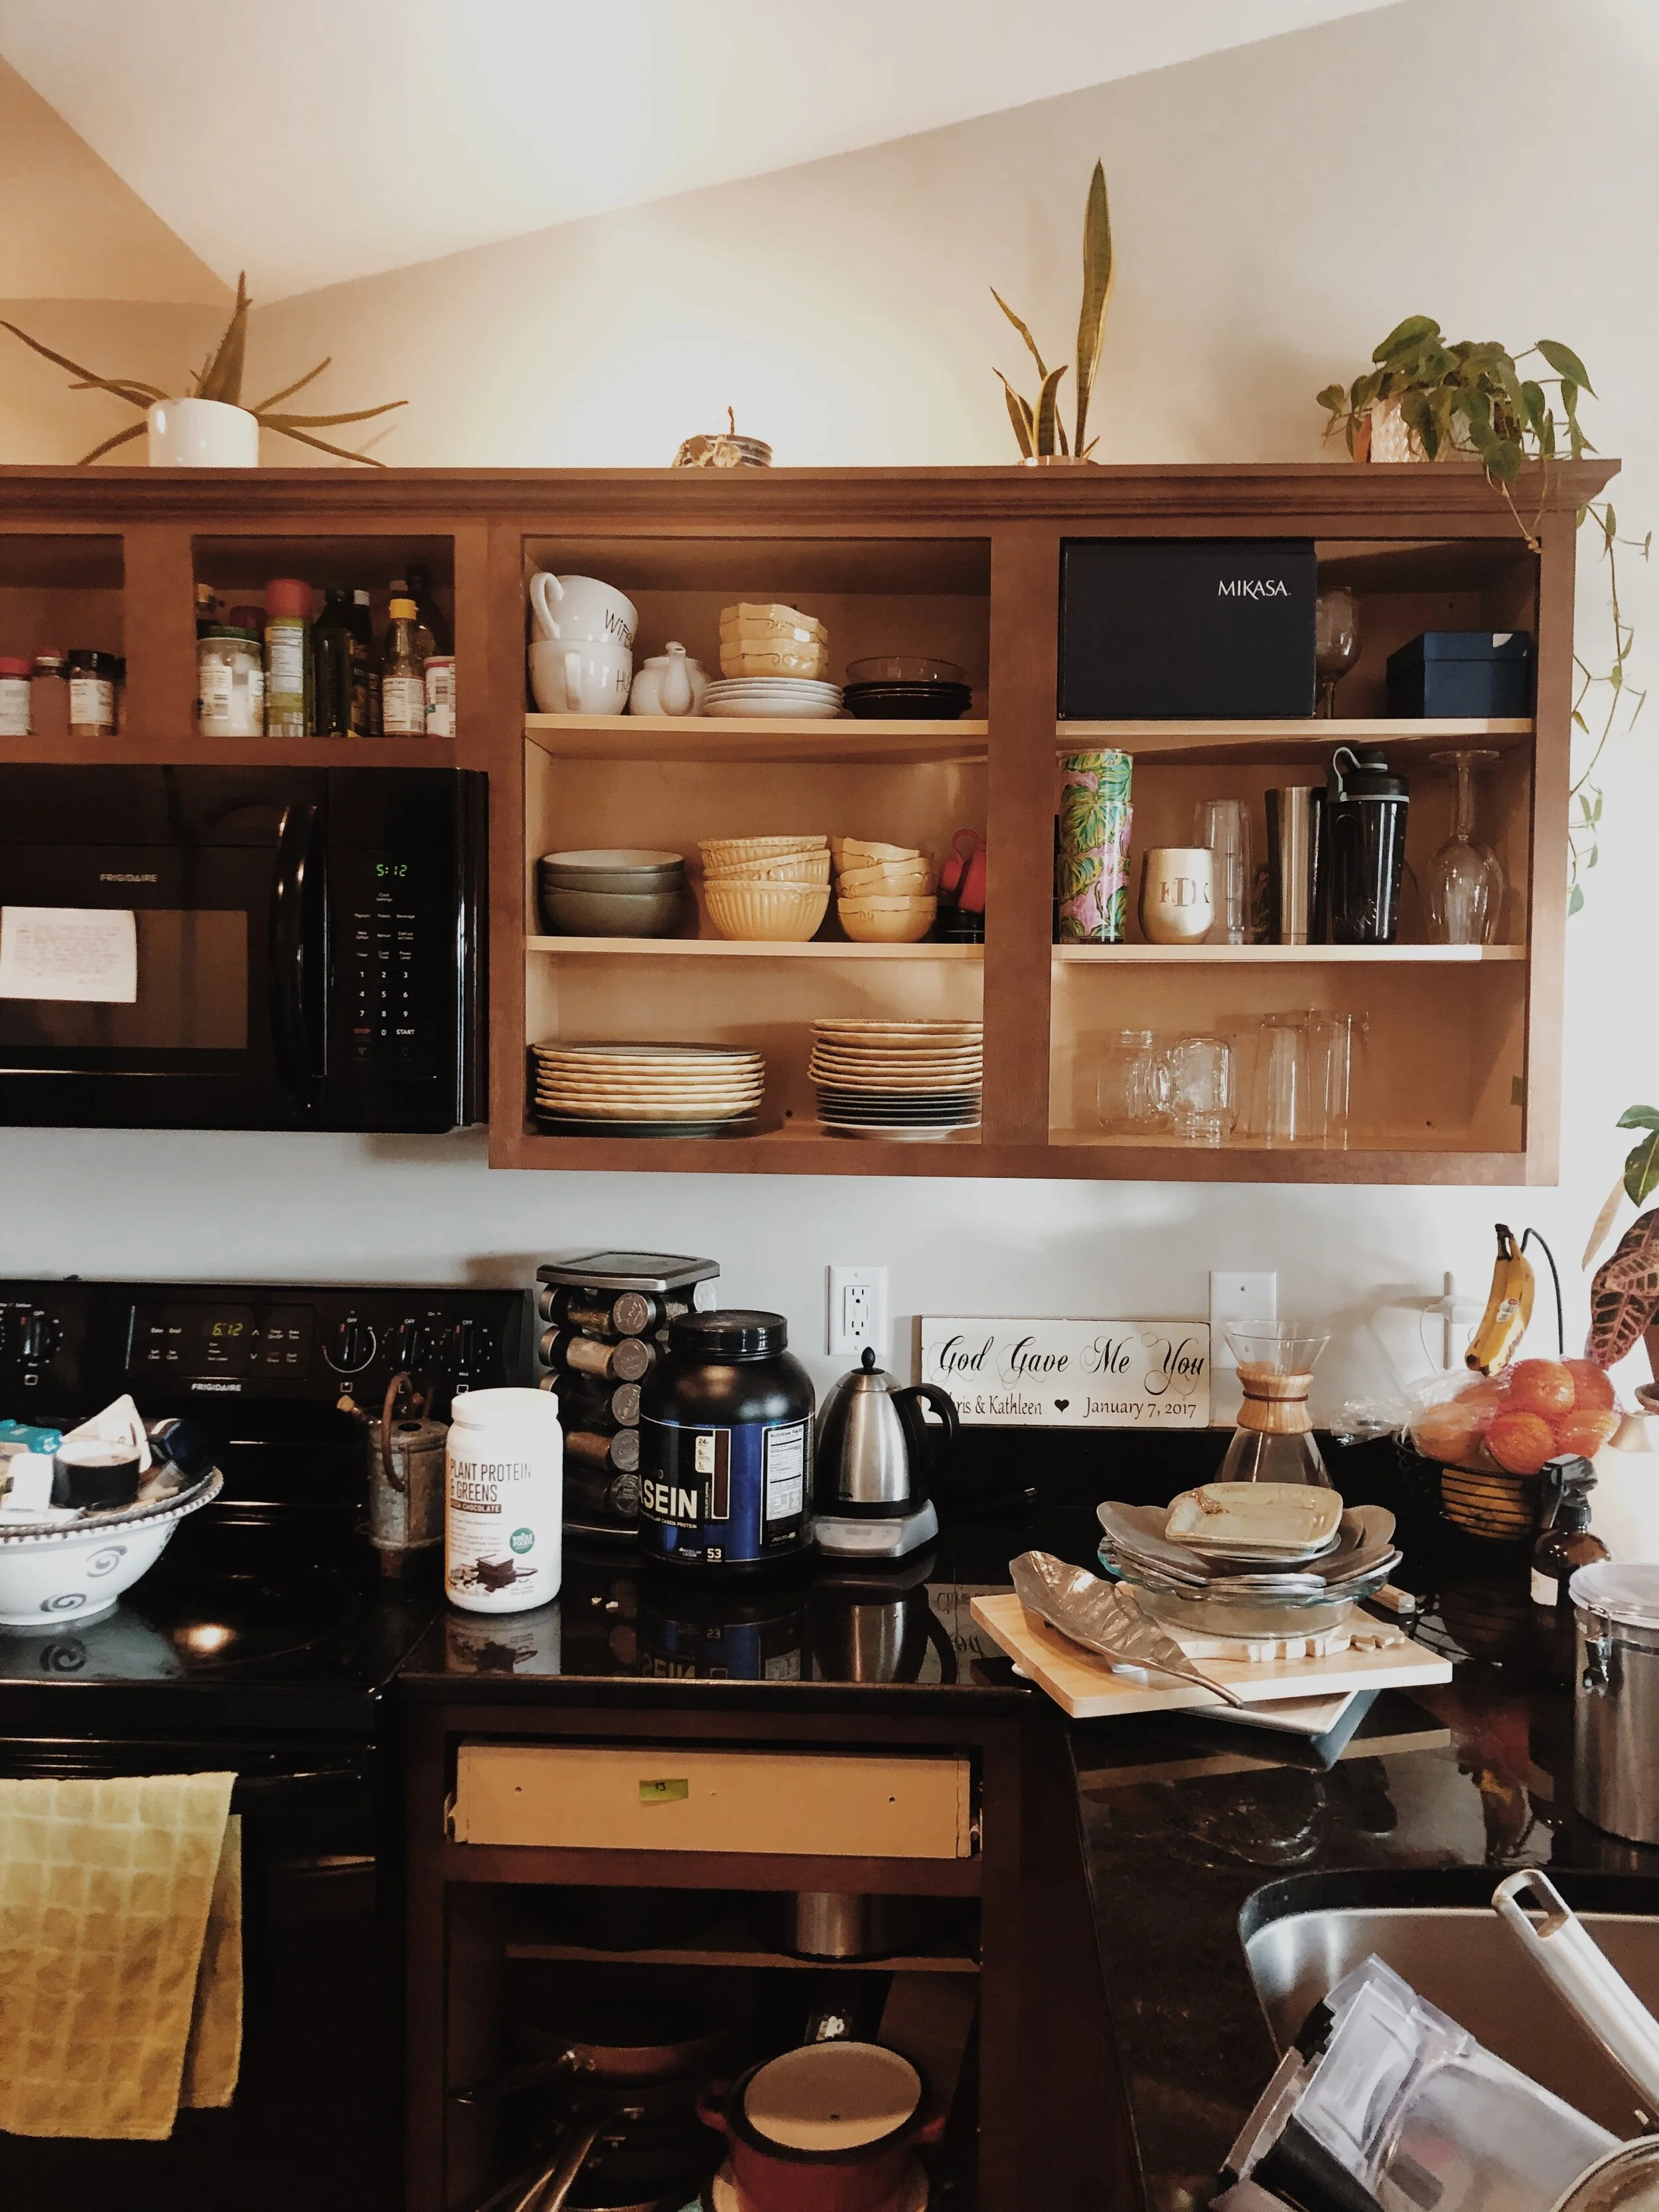
We also put in a wood backsplash the next weekend, which definitely wasn’t as time consuming as the cabinets were. We bought these cedar planks from Home Depot that were tongue and groove and fit in just perfectly. For that, we measured everything out, made cuts around the outlets, put wood filler in all the holes, sanded everything down really quick, put a few coats of polyurethane, and nailed them to the wall! We continued the wood look to the island as well & redid the stools to tie everything together! Also, we found these amazing wood outlet covers that blended in perfectly and made the outlets not stick out like a sore thumb!
Even though we had no idea what we were doing going into it, it was a super fun project to learn & do together!!! I was nervous the whole time about what the final outcome would look like, but we LOVE the way everything turned out!! Hope you guys are doing some fun quarantine projects yourself!!!


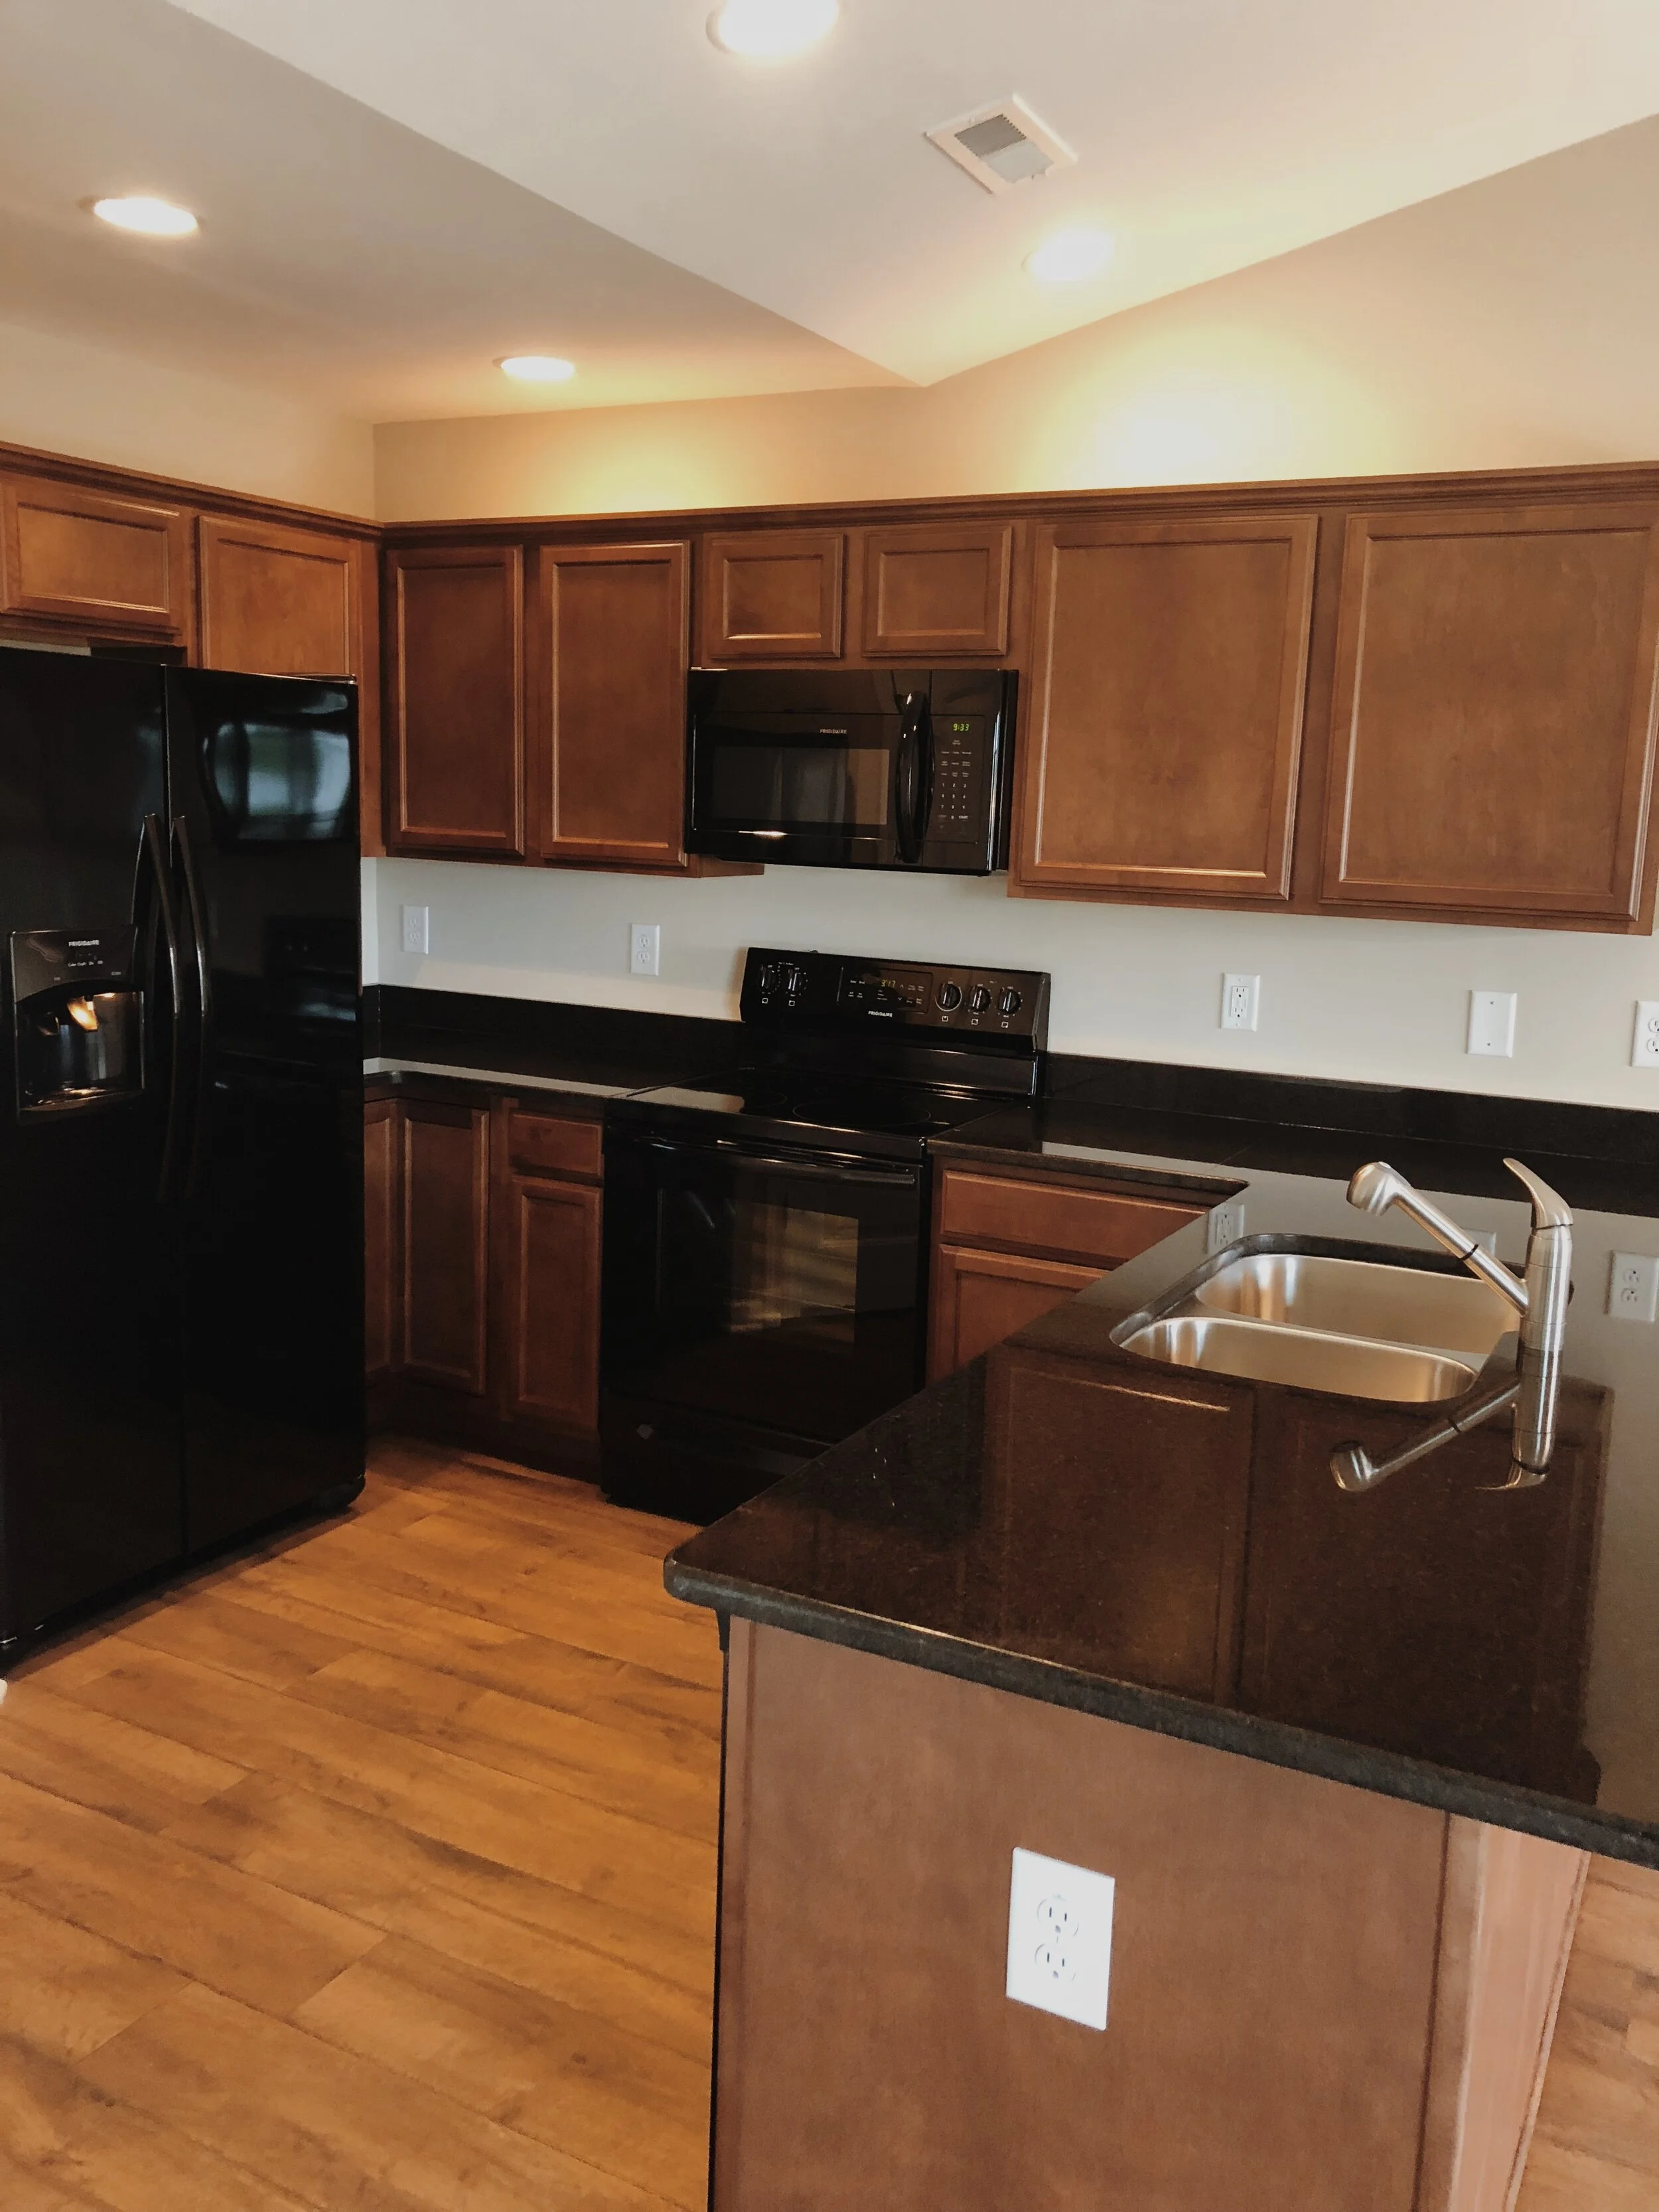
Before:
After: